Fill the application from documents
Four ways to fill a student's application form from their passport, certificates or our printed form, and what each one costs.
- 5 min
- 6 steps
- For everyone
Typing a whole application by hand is slow and easy to get wrong. You can let the system read the student's documents instead: one section at a time, the whole form from one file, or everything the student has uploaded. Whichever you use, check what it filled before you rely on it.
Step 1
Open the application form
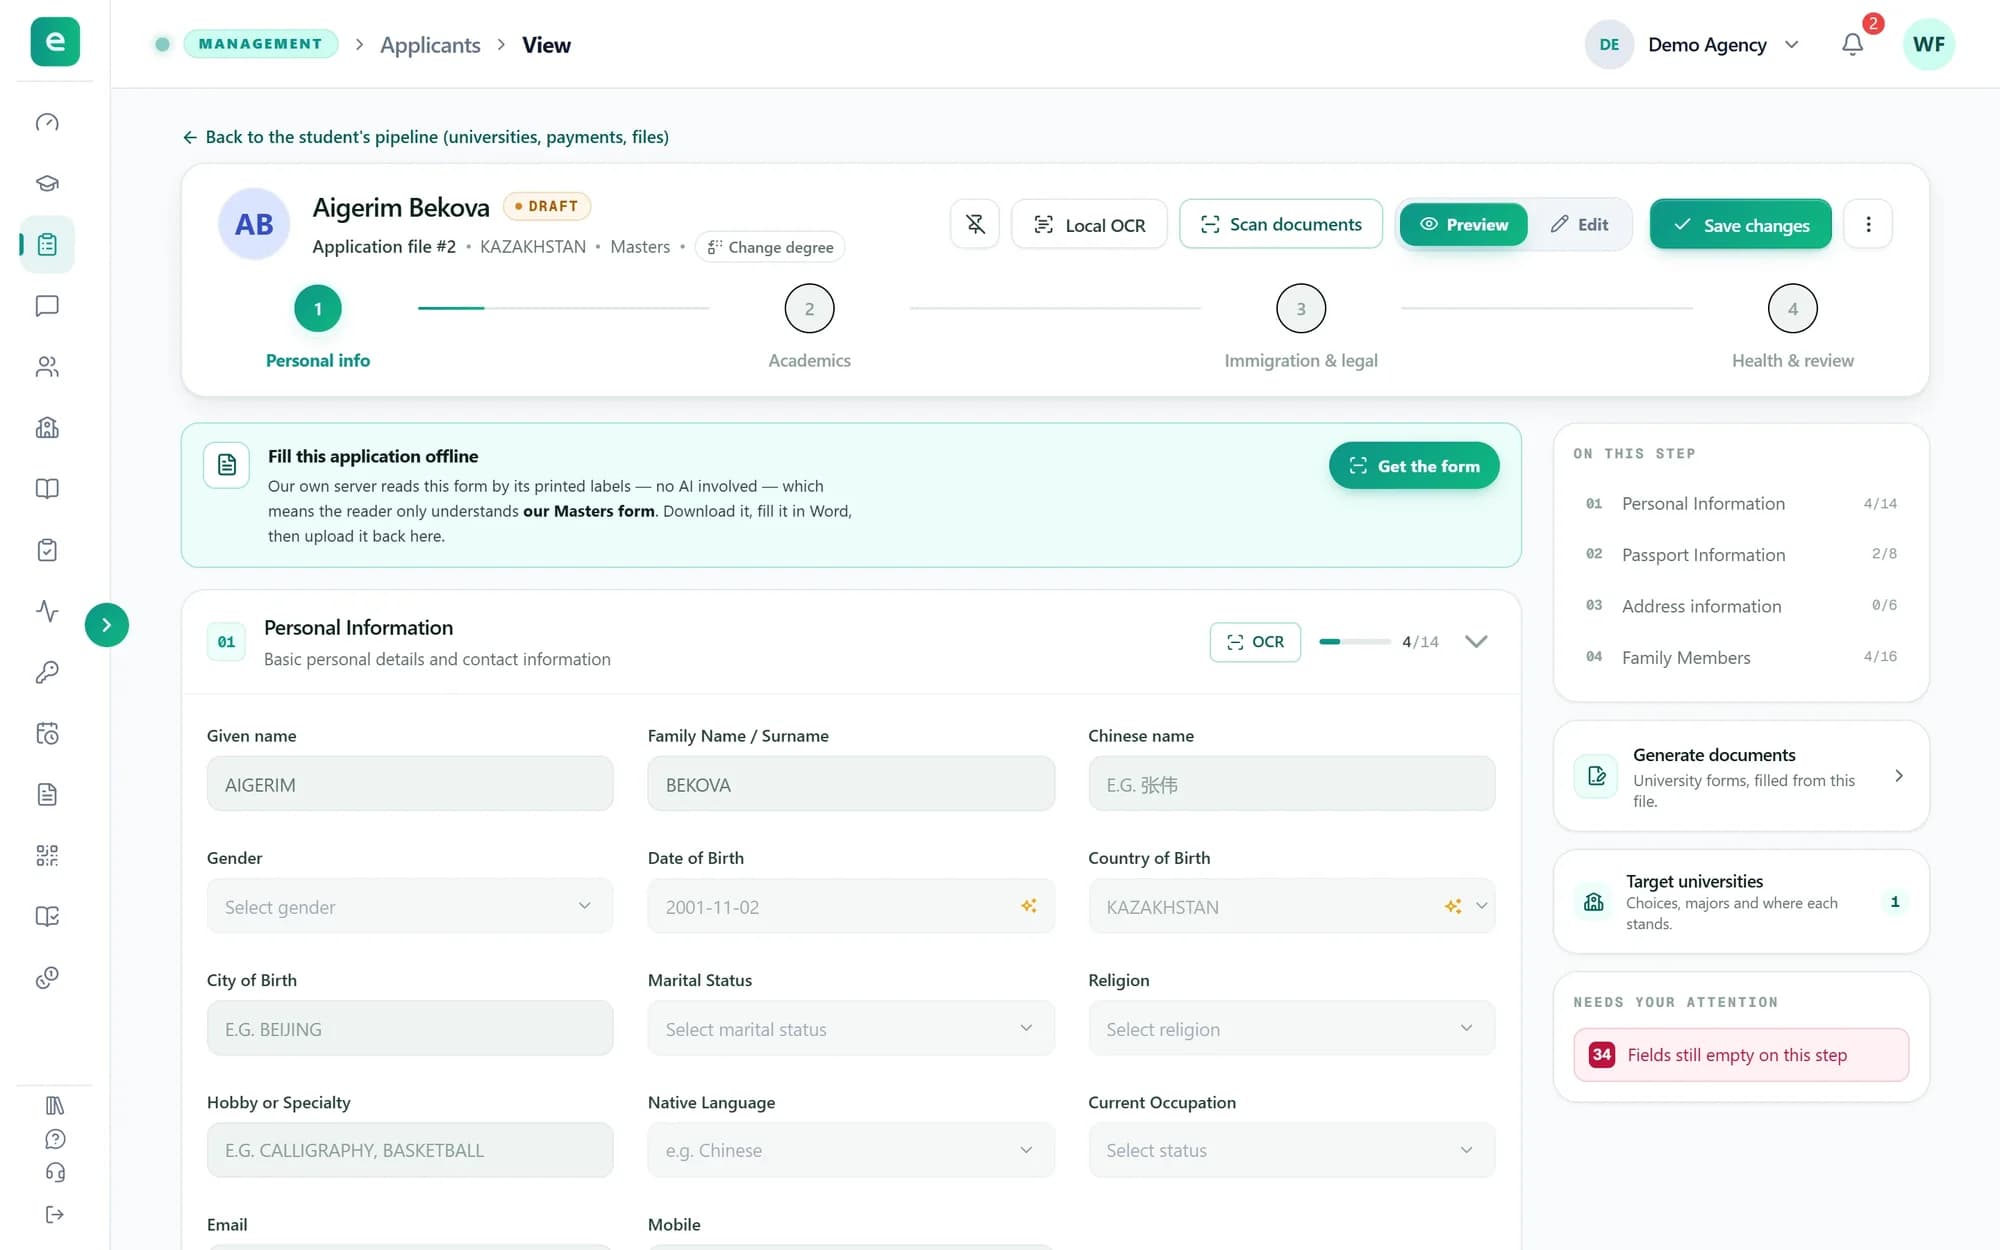
On the student's page, press Application form. The form has four steps: Personal info, Academics, Immigration & legal, and Health & review.
Two scan buttons sit at the top of the form: Local OCR and Scan documents. Each section also has its own OCR button in its header while the section is open.
Tip: To scan and save you need permission to edit applications (Applicant edit on your role). Owners and admins always have it. A partner sees the form, the scans and the AI fill only when the organization has switched Application form on for its desk. Sub-partners never do.
Step 2
Scan one section
Open a section, for example Passport Information, and press OCR in its header. Pick the document that holds those details: a photo, a PDF or a Word file. The AI reads it and fills that section only.
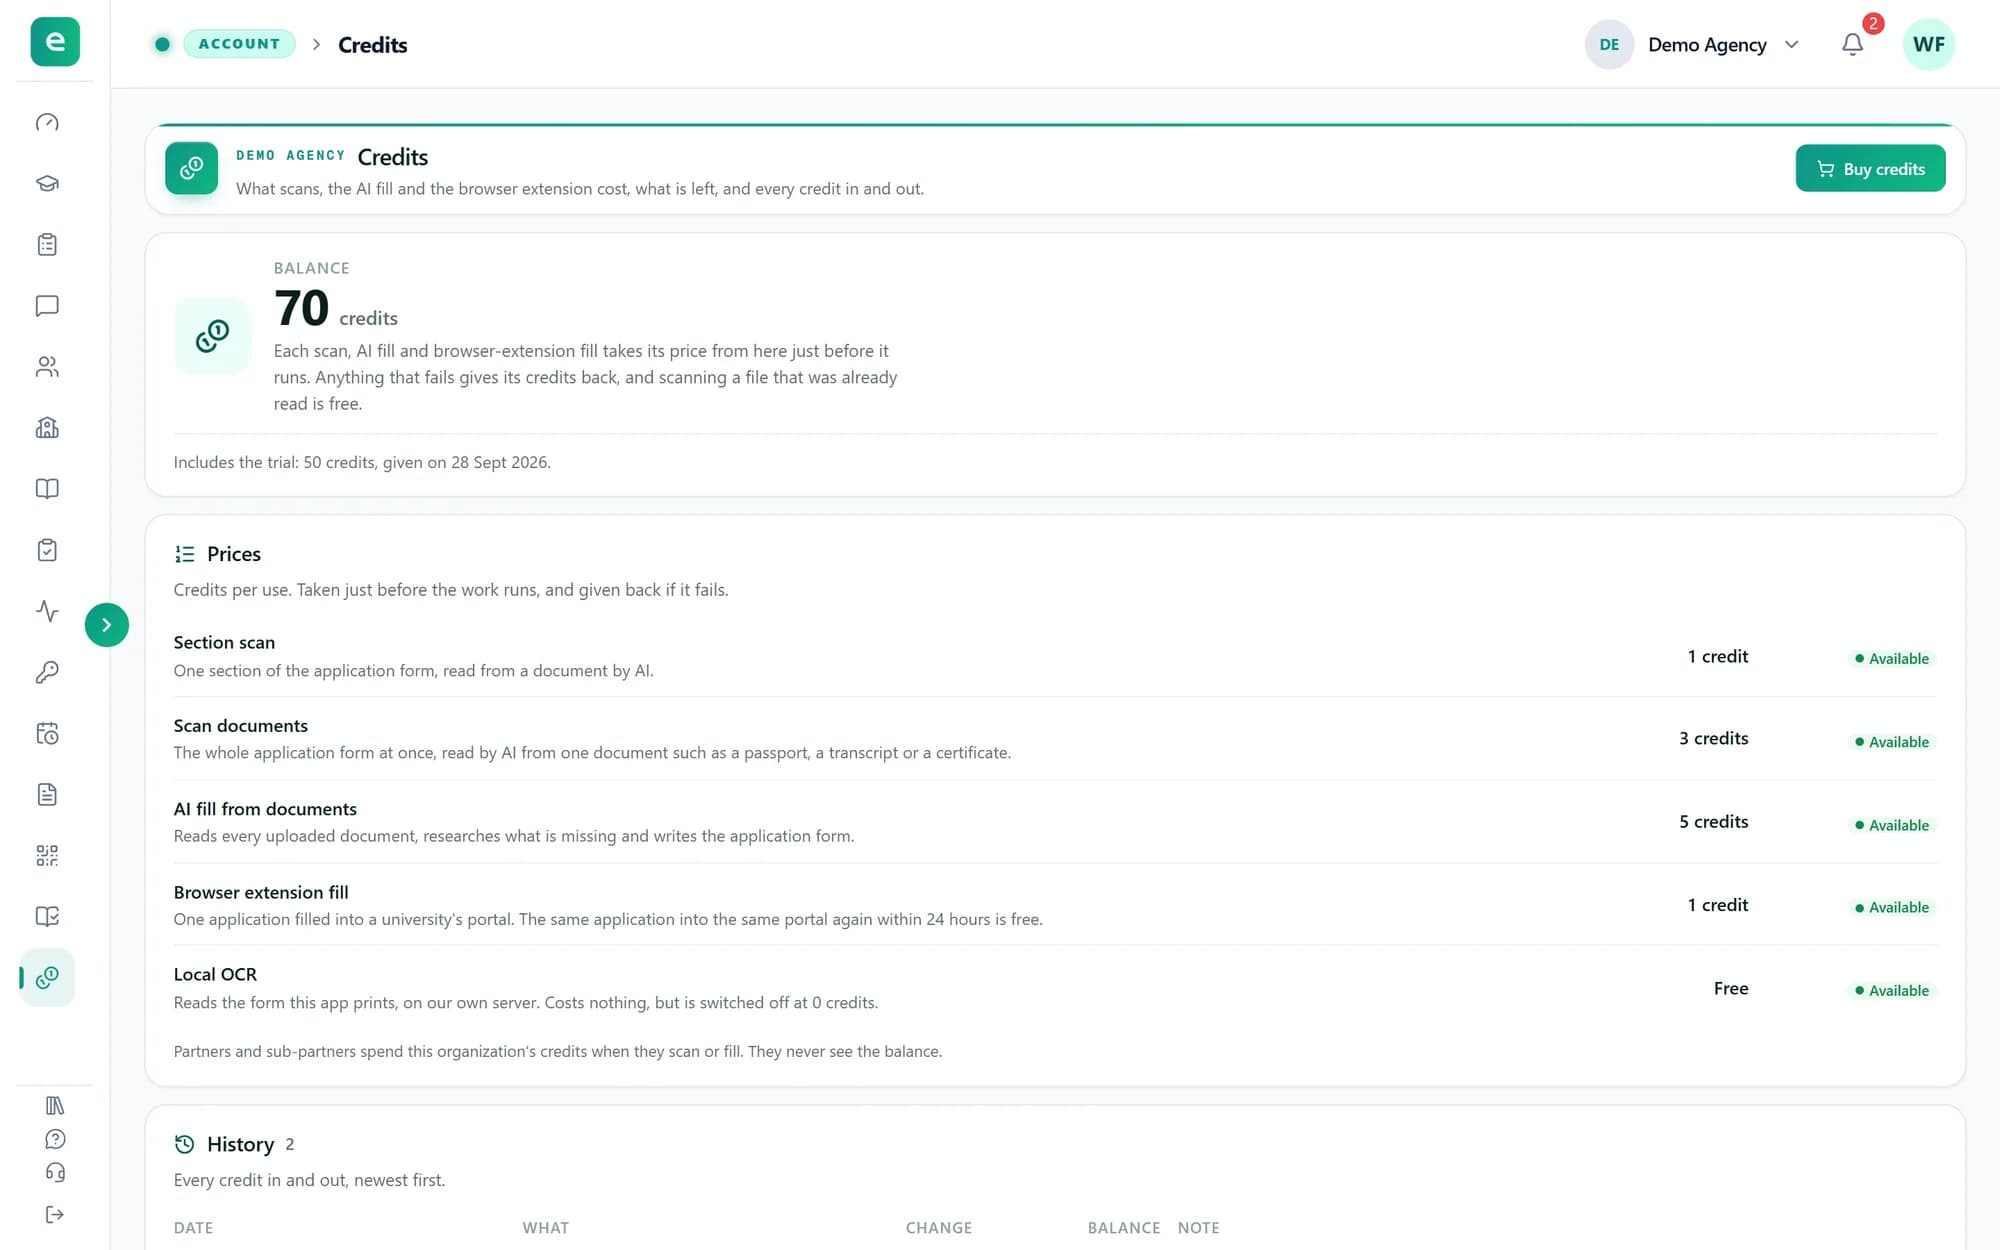
A section scan costs 1 credit.
Tip: Scanning a file that was already read is free, and a scan that fails gives its credit back.
Step 3
Scan one document into every section
Press Scan documents at the top of the form and pick one file, such as a passport, a transcript or a certificate. The AI fills every section it finds answers for. Repeat with the next file.
Each Scan documents costs 3 credits.
Tip: The AI scans send the file outside EduApplify to be read. Local OCR, in the next step, reads it on EduApplify's own server.
Step 4
Use our printed form with Local OCR
If the student fills in a form offline, give them ours. Press Get the form in the Fill this application offline box, or press Local OCR, then press Download beside Need the blank form? You get a Word file for this application's degree.
When the filled form comes back, drop it into the same window. It takes Word, Excel, PDF or a photo, up to 25 MB. The server matches the printed labels to the form's fields, with no AI. Local OCR is free, but it is switched off while your organization has 0 credits.
Tip: It only understands our form for this degree. Any other document comes back empty. If you change the degree, download the new form.
Step 5
Let the AI fill the whole form
Upload the student's documents to their checklist first. Then, on the student's page, press Fill form from documents, and press Fill form from documents again in the window that opens.
The AI reads the passport, certificates, transcripts and the filled form, looks up what is missing and writes the application form. It runs in the background: you can leave the page, and you get a notification when it is done. It costs 5 credits when it starts, and a fill that fails gives them back.
Tip: The AI fill saves its values straight onto the form. Values it looked up rather than read from a document are listed under Generated or researched values: check those first. Undo this fill puts the form back as it was. If you press Stop waiting, the credits are not given back.
Step 6
Check, then save
A scan puts its values into the form, but nothing is kept until you press Save changes. Read each filled field against the document, correct what is wrong, then save.
A scan replaces the fields it reads and leaves the others as they are.
Tip: At 0 credits the scan buttons show No credits. Press one to see why and how to get more.
What you have now
You now know four ways to fill an application from documents, what each one costs, and that every value is checked before it is saved.